Sunday, October 9, 2011

Need More Ghosts!


ghosts 013
I totally stole this idea off another blog.  I loved it so much, I wanted to share it with you.  In case you didn’t read the link on my facebook page for the other blog, I will show you how easy it is to add some spooktacular fun to your front yard for Halloween! 
I’m not even going to show you step by step instructions on this one because it will insult your intelligence.  Here’s what you need:
  1. Old Christmas ball ornaments.  They can be as big or as small as you want, mine were small.
  2. Squares of white fabric (you can cut an old sheet).
  3. Halloween ribbon or yarn.
  4. Fishing line.
  5. If you choose to add a face, you will need a fabric marker and googly eyes.

All you do is cut a tiny slit in the middle of the white fabric to push the top of your ornament through.  Next you tie a ribbon under the ball.  If you want a face you can hot glue your eyes and then then add a mouth.  Lastly, you add fishing line and hang from a tree or your porch.
This project would be a fun one to do with your kids, nieces, or nephews.
I made 10, because that is all the fabric I had.  I would like about 5 more.  We have 4 dogwood trees in the front yard and that is where I hung mine.
ghosts 015ghosts 016
ghosts 018ghosts 024

Also, here is our front porch all decorated for the fall:
ghosts 001
We haven’t carved our punkins yet.  I don’t own any Halloween decorations, so it’s pretty simple.  I’m slowly making and gathering Halloween stuff, so I can keep it for the years to come.  I think we might hang some lights on the porch to make it a little more fun.  We still haven’t gotten a new door, because I’ve been working so much.  
I also made this little rug for our front door:
ghosts 005
I bought the rug for $7 at Wal-Mart and then made a stencil by printing a font that I liked on regular paper and then cutting it out with sharp scissors.  I taped it down and then spray painted in the cut out.  I had some over spray from the wind and so I sprayed carpet cleaner and tried to scrub it out.  That’s why there is a white semi-circle.  I think it’s mostly left over paper towel.  lol Real professional, I know.  It’s just something you wipe your feet on, so it doesn’t really bother me.  Plus, I’m not a perfectionist by any means.

Cheers!

Sunday, October 2, 2011

Make Your own Halloween Wreath

Happy October!

I made my first, ever wreath. I love it! October is probably one of my favorite months out of the year. I’ve always loved the cool crisp air, the autumn smells, and Halloween is probably my favorite holiday. When else can you put on crazy clothes and run around asking complete strangers for candy, “Come On”! (Sorry about that. Kinda addicted to Arrested Development. It’s hard not to quote the Bluth family).

Okay, so if you want a quick and easy Halloween wreath, this one probably isn’t for you, but it is OH so cute. I’ve been away for quite a while (I actually have a job now) so I figured I owed you one.

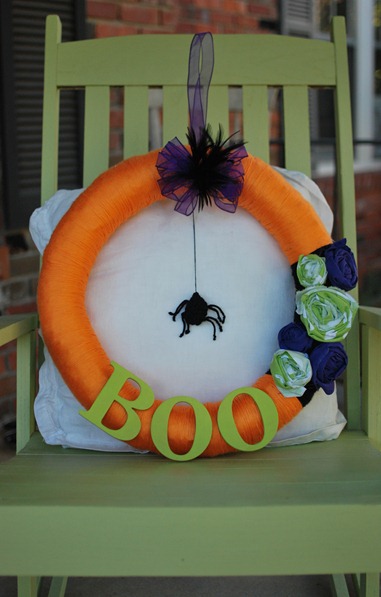
First things first, you might want to take a look at the finished product to see if you even want to make it. My command hook said to wait an hour, so it’s not yet hanging.
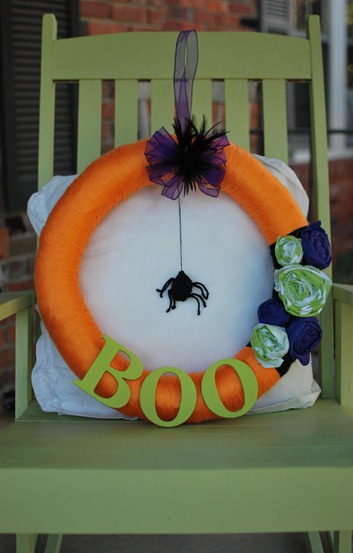
wreath 082

Step 1: Buy a round foam or straw wreath form.

Step 2: Buy yarn in your favorite Halloween color.

wreath 045

Step 3: Start wrapping, I would try to get all the straw covered, but don’t waste your time or yarn making it perfect, like I did. I ran out, so had to improvise with another color. When you get to the start of your wreath, just thread your yarn on a fat eyed needle and loop it under some of the yarn and tie it off. Cut the tail. Be warned this takes a LONG time. hours. Sit back and watch a few episodes of Arrested Development, or Community. Ahhhh…good shows.

Step 4: Start making your garnishes, I don’t know why I just called them that. Better names aren’t coming to me. The stuff to make your wreath pretty. How about flowers?

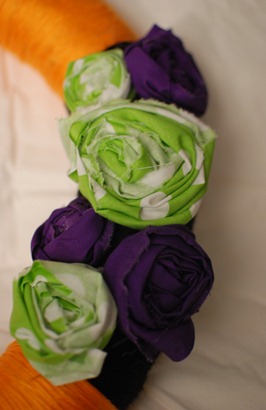
Step 5: Buy fabric and make roses. If you don’t know how to do this, just google, fabric rosettes or something. This post is already going to be too long to teach you this. Sorry.
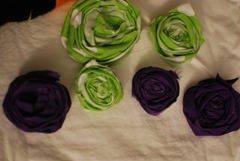
wreath 071

Step 6: Oh wait I forgot to tell you everything you need to buy for this project. I will do this now. You’re a smart cookie, just move this up to step one (in your head).

wreath 067

I didn’t use the felt, but you can make felt flowers or whatever with it. I bought sheer purple ribbon with wire, black feathers (out of Hobby Lobby’s floral dept. 50 cents a piece), fabric of your choice, chip board letters (you can spell out whatever you want, and craft paint in your color choice (not pictured).

Step 7: Go ahead and paint your chip board so it can be drying.

wreath 079

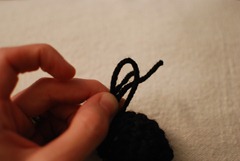
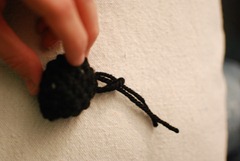
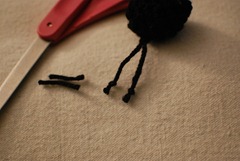
Step 8: I made my spider. Really none of this has an order, incase you couldn’t tell. If you don’t know how to crochet or knit you can skip this step and just buy a plastic spider from a dollar store. I just knitted a circle, stuffed it with two cotton balls, tied it up. Here is how I made the legs. Just click to enlarge pics if you need to.

wreath 056wreath 052wreath 053wreath 054wreath 055wreath 058

Pull tight and repeat three more times, until you have eight legs. Also, you can add googly eyes, but I just didn’t have them.

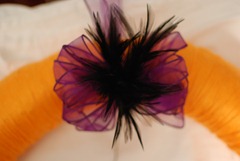
Step 9: Make your bow. I just wrapped mine loosely around my hand until I thought I had enough, then tied it real tight in the middle with yarn. Lastly you spread it out.
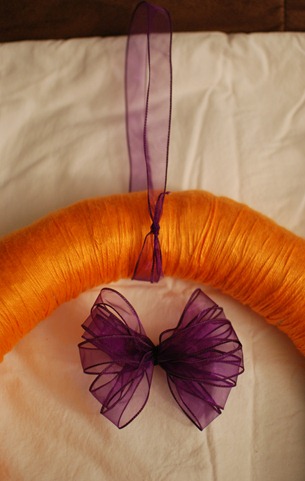
wreath 070

Now would also be a good time to make your loop that you will hang your wreath up by. I just double knotted my ribbon and hot glued it.

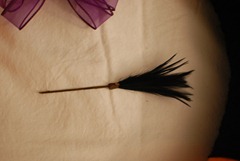
Step 10: Hot glue ribbon and attach feathers.
wreath 072wreath 074

wreath 075

You can stick your feathers anywhere on your wreath, but I chose to stick them in the middle of my bow. Just used wire cutters and trim the ends off. The feathers will not stick THROUGH the ribbon, so just adjust the best you can and push them through the yarn and straw.

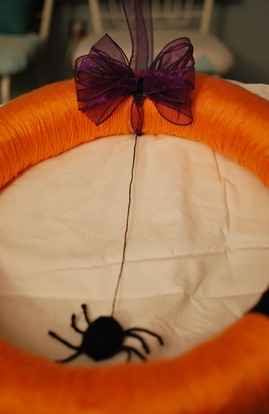
Step 11: Attach your spider. I took a piece of embroidery floss and hot glued him to the back of the wreath.wreath 073
Step 12: Hot glue your flowers.

wreath 076

I glued them over the black yarn to hide it some.

Step 13: Hot glue your letters, aaaaaaaannnddd then you are done! Finally, right? I’m going to hang mine on my front door by a silver command hook. I’m so happy to have something to make my ugly door pretty! Btw, we should be getting a new door soon. Stay tuned.
wreath 082

This project cost around $15 and oodles of time (I got it all done in one night), but it was really fun!

Cheers!

Sunday, September 4, 2011

Painted Backsplash

There are two things I know about the previous owner of our home. One: she loved to study the bible, two: she loved to cook. This last statement is evident from the some 200 canned goods we found in our kitchen and the grease splattered wood paneling in our kitchen.

There is probably about 70 years worth of goo on the paneling. I cleaned it when we moved in and one of the walls I painted. When I primed the wall I noticed immediately that the wall looked yellow. I was using Kilz acrylic primer. After some googling I read to use oil based primer. So, I went out and bought that.

When I painted the cabinets I decided to leave the backsplash how it was because I didn’t want to do extra work. Well, It’s been a few months and I don’t think I’m getting my subway tile anytime soon. We have to get countertops first, then we can tile. I couldn’t take it any longer, so this weekend I decided to paint. It took two coats of oil based primer and two coats of paint. It could use another, but since it’s a temporary fix I opted not to. Oh, I decided to paint it the color of the cabinets, so I could kinda get a feel of what it would look like with white subway tile.

Here is the before:

kitchen 037

kitchen 038

Also notice the nasty brown backsplash behind the stove. Ewww…why did people love brown stuff so much? Brown floors, brown walls, brown vents, brown fans, brown sinks, brown backsplashes. Thank goodness the times have moved past the brown stage. Here is the backsplash now. (remember this will all be tiled and there will be a stainless microwave where the vent is, in the future).

kitchen 045

I taped off the whole area and used garbage bags to make sure I didn’t get paint anywhere but where I wanted. I primed the area twice and then spray painted it hammered silver. I think it looks much better. Beware of fumes, between the spray paint and the oil primer….I almost died….twice.

kitchen 042

Sooooo much better, in my opinion. I haven’t added handles to the drawers, because the ones I ordered are way too big. Not sure what I’m going to do yet. Also, we are going to replace the cabinet doors on the top row of cabinets. Underneath I would love to have open storage. I plan on painting the backs of the cabinets a dark blue green so my white dishes will pop. On the left (which is now our pantry) will have all my antique kitchen thingys. We actually have a pantry but we need to put up drywall in there.

Here is a close up of some of my favorite things in my kitchen.

kitchen 047

Vintage canisters. I scored these babies for $10 at a yard sale!

kitchen 054

That grease container was my Maw-Maws. I love it. Old blue mason jar from goodwill. $3. Old kitchen doohickies I’ve collected over the years.

kitchen 055

Glass container collection. I’m probably going to store candies and treats in these. Maybe some rosemary olive oil in the glass container on the far left. It has a name, but my mind is blank. It’s actually an old wine bottle. I know this because it had the label on it when I bought it at a thrift store.

kitchen 062

I’m getting so low on Guyana sugar. : ( It’s called Demerara Gold, if you were curious. We brought home 40lbs from Guyana, South America when we went on a mission trip back in 2010.

And lastly, my new best friend:

kitchen 057

An electric water-heater, tea pitcher. Can you tell that it’s been a while since I’ve blogged? I can’t figure out the right words for anything! Anyways this little guy, I think his name is Bodum, came from Hudson’s Dirt Cheap. His ticket said $40, which is typical for electric kettles (?) but you know I NEVER pay ticket price. I got him for a whopping $8! He’s supposed to be my x-mas gift, but I begged The Jeffrey to let me have him early! Wow, is tea making a jiffy! He heats water so quick. I love it!

So, there you have a few of my favorite things. Kinda like Oprah, but not.

Cheers!